How to Get Started with Manual Camera: DSLR Camera Pro?
- 1. Understand Basic Camera Settings:
- - Aperture: Controls the amount of light entering the lens; affects depth of field.
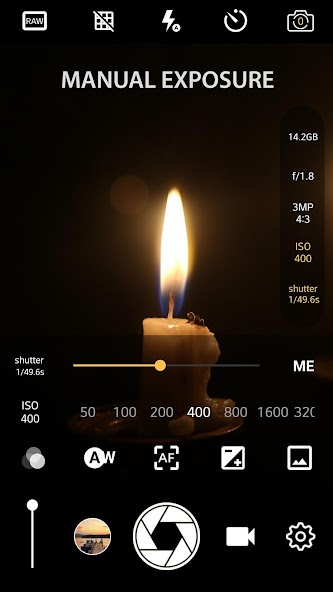
- - Shutter Speed: Determines how long the camera's sensor is exposed to light; affects motion blur.
- - ISO: Measures the sensor's sensitivity to light; higher ISO allows for better low-light performance, but may introduce noise.
- 2. Learn Exposure Triangle:
- - Balance aperture, shutter speed, and ISO for proper exposure.
- - Experiment with combinations to see how they affect the final image.
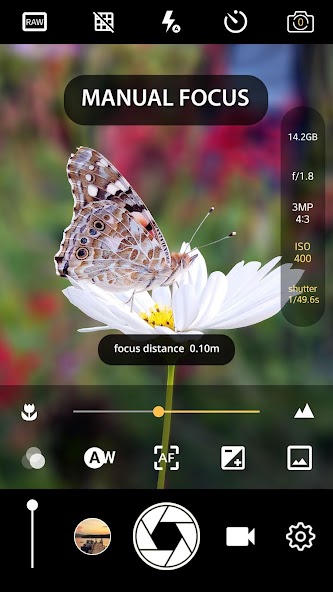
- 3. Master Focus Techniques:
- - Use manual focus for precision in challenging conditions.
- - Familiarize with autofocus modes (single, continuous, and automatic).
- 4. Compose Your Shots:
- - Use the rule of thirds to create balanced compositions.
- - Experiment with leading lines, symmetry, and framing.
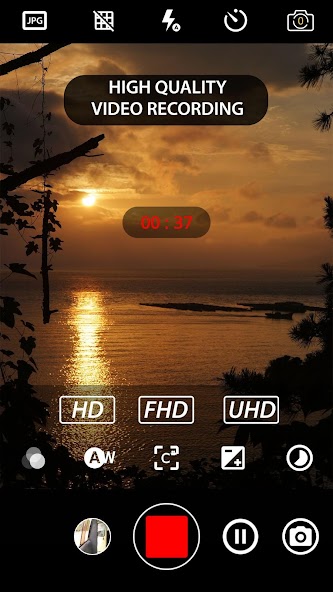
- 5. Utilize Lighting:
- - Identify ideal lighting conditions (golden hour, overcast).
- - Understand the impact of natural and artificial light.
- 6. Control Depth of Field:
- - Use wide apertures (small f-stop numbers) for shallow depth (blurry backgrounds).
- - Use narrow apertures (large f-stop numbers) for greater depth of field.
- 7. Experiment with Perspectives:
- - Change angles and heights for unique perspectives.
- - Shoot from low, high, or unusual vantage points.
- 8. Familiarize with Post-Processing:
- - Use software (Lightroom, Photoshop) for editing photos.
- - Learn basic adjustments: exposure, contrast, saturation.
- 9. Practice Regularly:
- - Shoot frequently to build skills and confidence.
- - Challenge yourself with different subjects and techniques.
- 10. Study Great Photography:
- - Analyze work of professional photographers.
- - Learn from critiques and tutorials.
- 11. Join Photography Communities:
- - Participate in forums or local clubs for feedback and support.
- - Attend workshops for hands-on experience.
- 12. Invest in Quality Lenses:
- - Explore different lenses for various effects.
- - Consider prime lenses for sharpness and clarity.
- 13. Maintain Your Equipment:
- - Clean lenses and sensor regularly.
- - Store camera properly to prevent damage.
- 14. Never Stop Learning:
- - Stay updated with photography trends and techniques.
- - Read books, watch videos, and attend workshops.
10 Pro Tips for Manual Camera: DSLR Camera Pro Users
- 1. Master Exposure Triangle: Understand the relationship between ISO, aperture, and shutter speed for optimal exposure.
- 2. Use Manual Focus: Switch to manual focus for greater precision, especially in low light or when shooting macro.
- 3. Shoot in RAW: Capture images in RAW format for maximum editing flexibility and better post-processing quality.
- 4. Utilize Histogram: Analyze the histogram to assess exposure accuracy and avoid clipping highlights and shadows.
- 5. Experiment with Depth of Field: Adjust aperture settings to control the depth of field for creative effects, isolating subjects from backgrounds.
- 6. Use a Tripod: Stabilize your camera for long exposures, landscapes, or architectural shots to ensure sharp images.
- 7. Adjust White Balance: Set the white balance manually to match your lighting conditions, enhancing color accuracy.
- 8. Understand Composition: Apply the rule of thirds, leading lines, and framing techniques for more engaging photos.
- 9. Practice Bracketing: Capture multiple exposures for challenging lighting conditions to create dynamic range in post-processing.
- 10. Learn to Use Fill Flash: Use fill flash in bright conditions to reduce harsh shadows on subjects, improving portrait quality.
The Best Hidden Features in Manual Camera: DSLR Camera Pro
- 1. Customized Presets: Save your preferred settings for quick access during shoots.
- 2. Focus Peak Highlighting: Visually identify in-focus areas in live view mode for precise focusing.
- 3. Histogram Display: Monitor exposure levels in real-time to avoid underexposed or overexposed images.
- 4. Manual White Balance Fine-Tuning: Adjust white balance in smaller increments for more accurate color representation.
- 5. Live Exposure Simulation: View how adjustments will affect exposure before taking the shot.
- 6. Grid Overlays: Use grids to improve composition and alignment in your photos.
- 7. Dual Card Slots: Separate storage for RAW and JPEG files or backup redundancy.
- 8. Customizable Function Buttons: Assign frequently used settings for quick access.
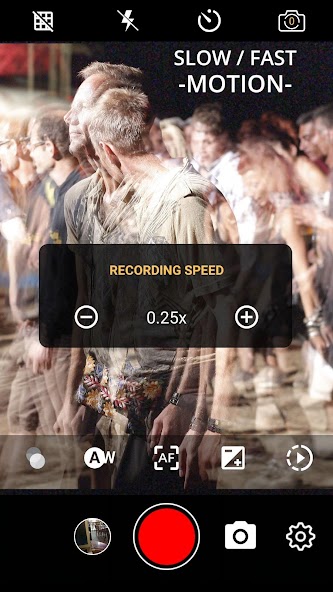
- 9. Intervalometer: Capture time-lapse sequences without the need for external equipment.
- 10. Mirror Lock-Up: Reduce camera shake for improved sharpness in long-exposure shots.
Manual Camera: DSLR Camera Pro Faqs
What shooting modes are available in Manual Camera?
Manual Camera offers several shooting modes including Auto, Manual, and Professional mode. Each mode provides different levels of control over settings like exposure, focus, and ISO, allowing users to match their photography needs.
How can I adjust the exposure in Manual Camera?
To adjust the exposure, use the exposure compensation slider in the manual settings. Sliding it left decreases exposure, while sliding it right increases it, allowing you to achieve the desired brightness for your photos.
What is the purpose of RAW format in Manual Camera?
Shooting in RAW format retains more image data than JPEG, allowing for better post-processing. This is beneficial for photographers who want more control over their exposure, color balance, and other adjustments in editing.
How do I manually control focus in Manual Camera?
To control focus manually, switch to Manual focus mode in the app. Once activated, use the focus slider to adjust the sharpness of the image. This allows you to focus precisely on your subject.
Can you explain how to use the histogram for better exposure?
Using the histogram can significantly improve your exposure settings. Follow these steps: 1. Activate the histogram display in settings. 2. Take a test shot. 3. Analyze the histogram's peaks; ideally, they should be spread evenly. 4. Adjust exposure based on where the peaks are located to avoid overexposure or underexposure.


1.Rate
2.Comment
3.Name
4.Email